学习内容
tips:
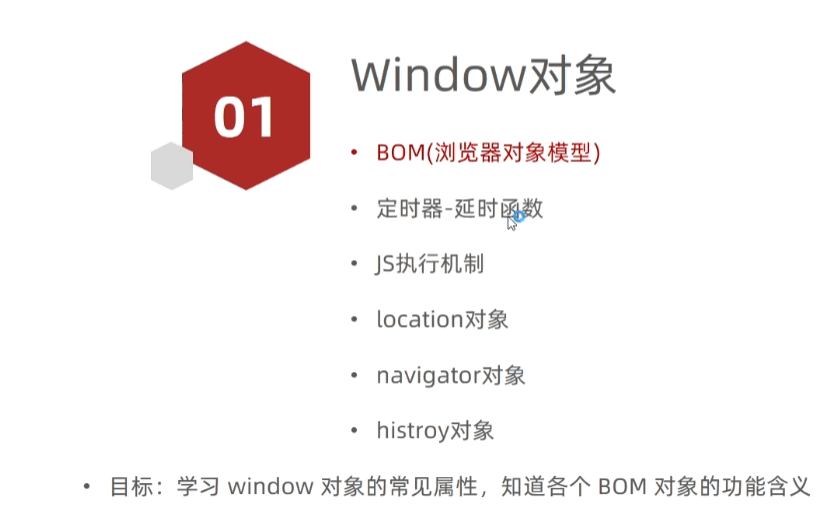
1-location的常用作用就是用js跳转网页,如我们支付成功,页面提示多少秒后自动跳转。
2-navgator大部分是用于获取当前用户是如何浏览的,是手机还是电脑,是谷歌浏览器还是火狐浏览器等,如京东你访问jd.com,如果检测到你是手机则自动跳转m,jd,com
3-history对象可以让浏览器操作网页返回上一步下一步
4-screen可以拿到屏幕信息
BOM
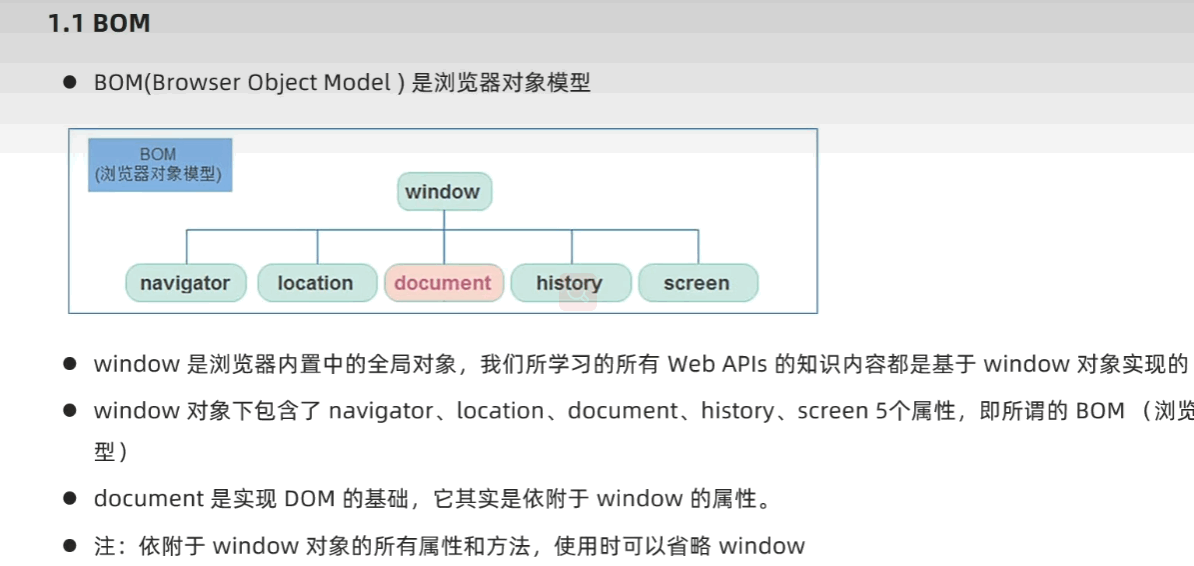
如上,其实我们的document也是包含在window对象中的,bom包含了它们所有
在平时的一些语句中,其实都需要写一个window对象,只是默认省略了。
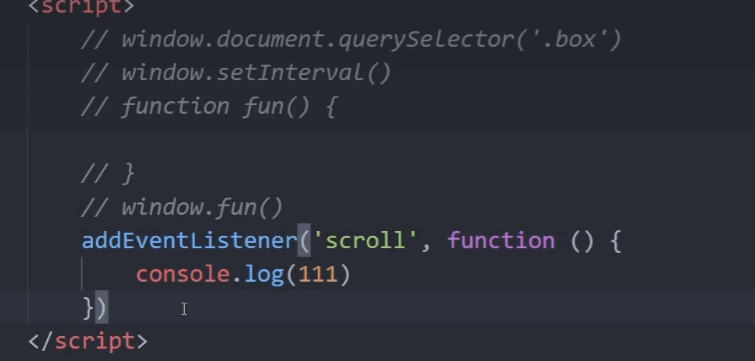
如上监听器监听页面滚动事件,这个window也是可以省略的。
定时器-延时函数
注意这里的setTimeout的Timeout是一个单词,所以out的o不需要大写。
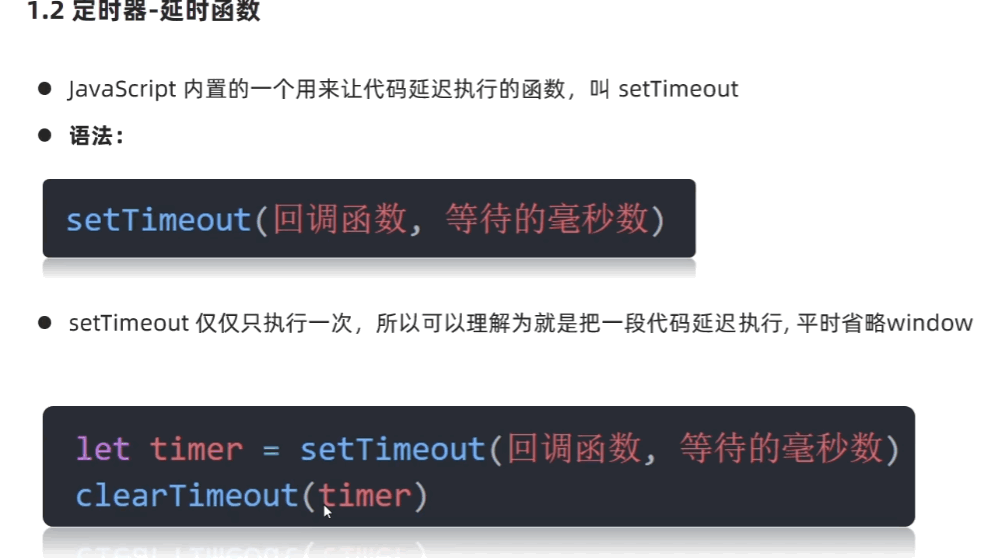
setTimeot和setInterval不同,它只执行一次,即等待的毫秒数一过就执行
timeout很简单的意思,就是超时,等待超时后执行的函数就是延时函数。
<body>
  <p>炸弹将在三秒后在控制台爆炸</p>
  <input type="button" value="清除炸弹">
 <script>
   let timer = setTimeout(function(){
    console.log('轰轰轰炸弹炸了')
   },3000)

   let clear = document.querySelector('input[value="清除炸弹"]')
   clear.addEventListener('click',function(){
    clearTimeout(timer)
   })
 </script>
</body>
案例
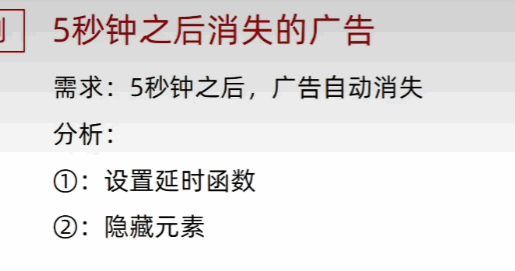
<body>
  <img src="./广告.jpg" alt="">
  <script>
    let img = document.querySelector('img')
    setTimeout(function () {
      img.style.display = 'none'
    }, 3000)
  </script>
</body>
延时递归函数(了解)
这里是利用递归机制,让setTimeout实现和setInterval一样的功能,众所周知递归函数就是自己调用自己。
利用递归,让setTimeout实现setInterval功能
<body>
    <div>
    </div>
    <script>
        let div = document.querySelector('div')
        function fn() {
            div.innerHTML = new Date().toLocaleString()
            setTimeout(fn, 1000)
        }
        fn()
    </script>
</body>
js的执行机制(面试必问)

这两个结果都是1111-3333-2222,为什么定时0,还是最后执行呢?这就是js执行机制的问题。
js是单线程的

比如最上面的setTimeout函数,当我设置1000秒,因为是单线程,岂不是要一直等?所以出现了同步和异步。
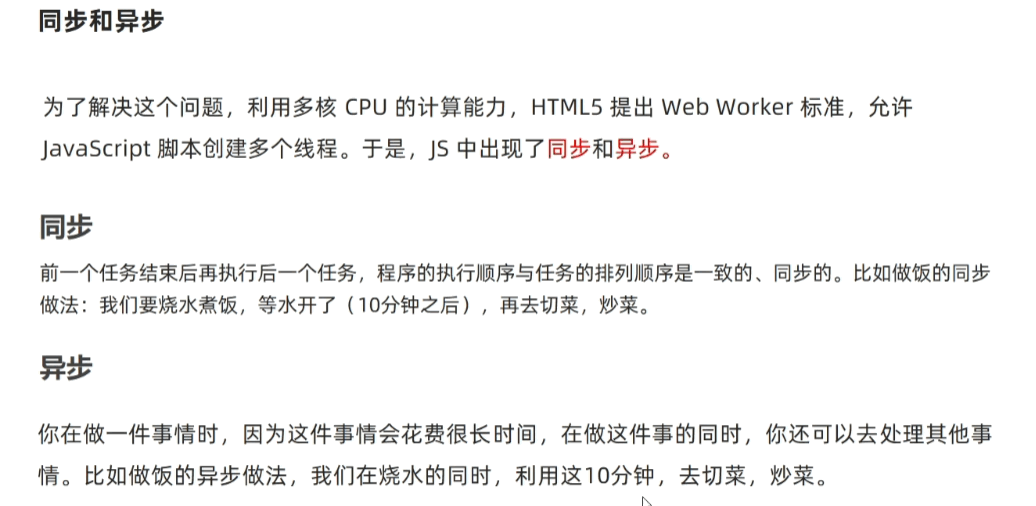
同步任务会存在一个执行栈,异步任务会放在任务队列
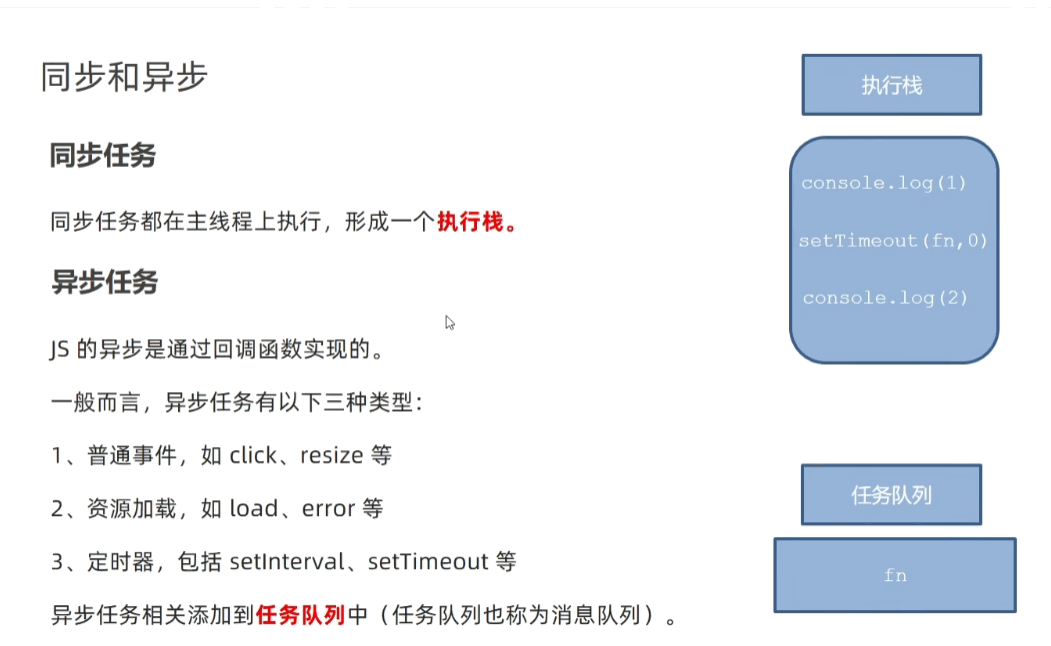
当同步任务执行栈中的任务全部执行完,才会去按照顺序将异步任务的任务队列中的任务提取到执行栈来。

定时器,普通事件,资源加载事件,ajax都是异步的。
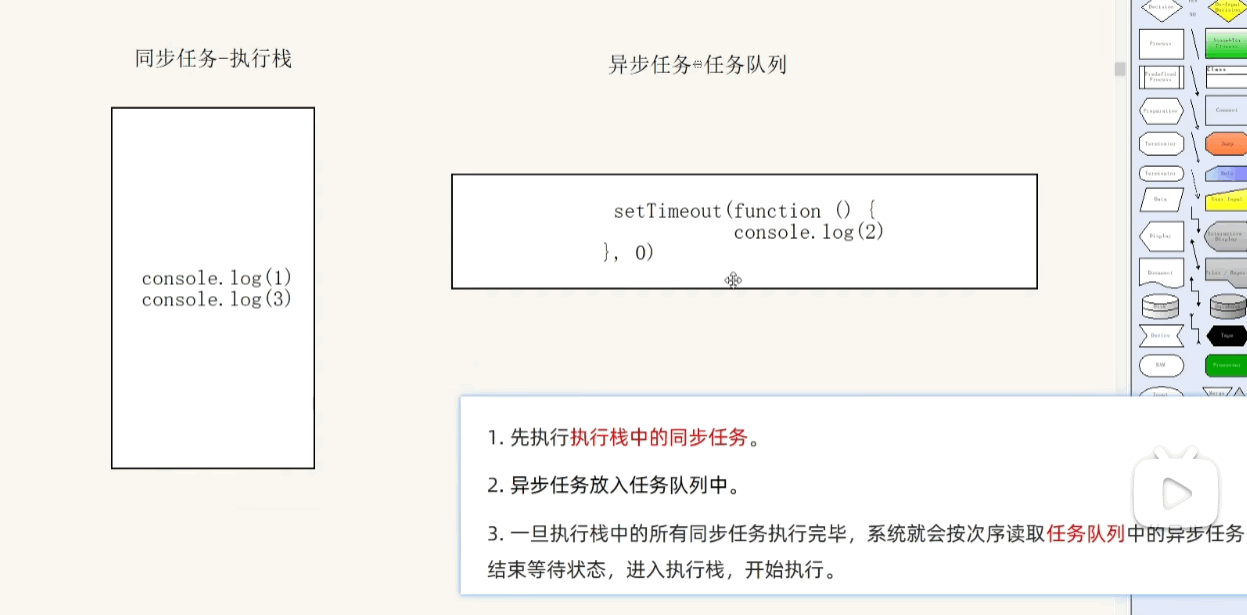
那么问题又来了,那么多异步任务,我怎么知道先让那个进入执行栈。
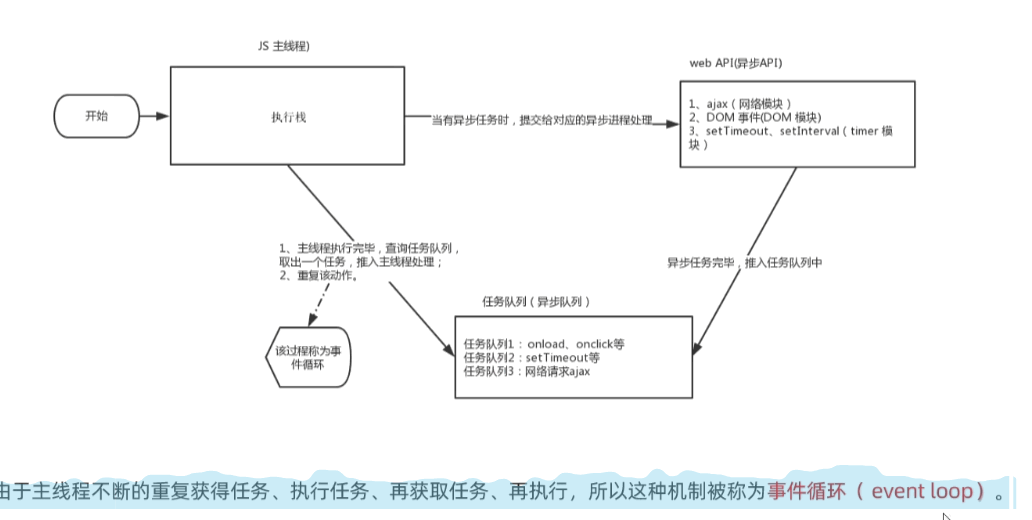
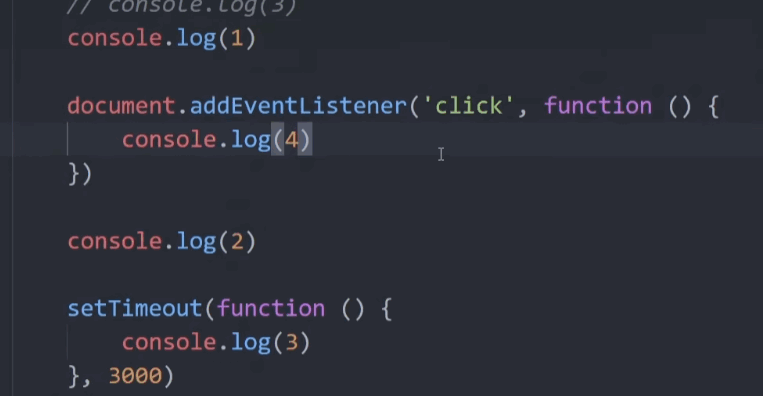
如这串代码,可能是1234也可能是1243,是在异步任务在筛选后再进入执行栈,情况不同自然顺序不同。
location对象
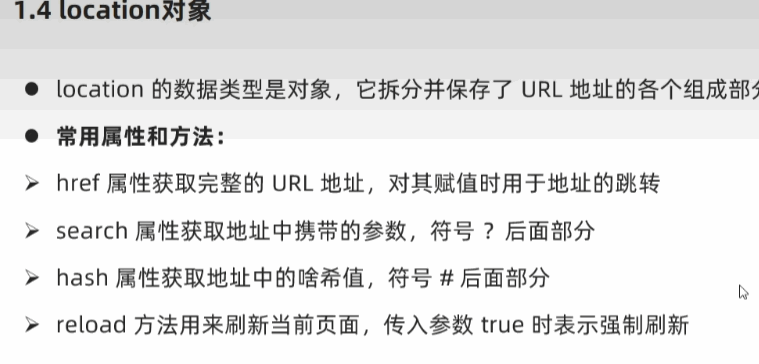
location.href
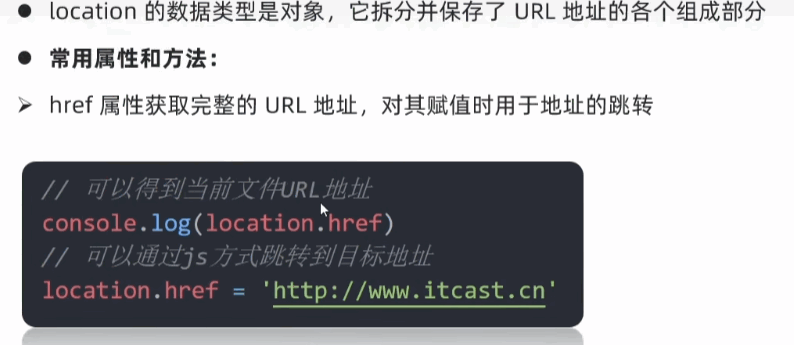
案例
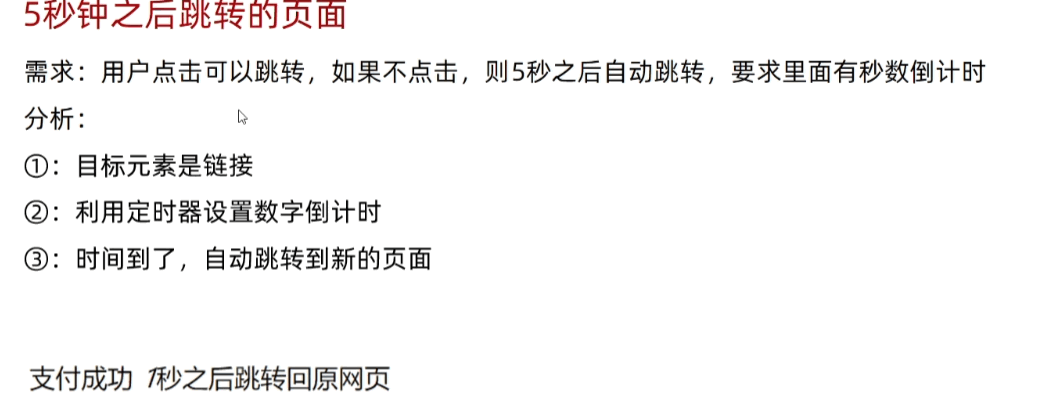
<body>
    <div class="main">
        <h1>支付成功</h1>
        <p>将于<span>5</span>秒后自动跳转</p>
        <button>立即跳转</button>
    </div>
    <script>
        let button = document.querySelector('button')
        let seconds = document.querySelector('span')
        let i = 5
       timer=  setInterval(function () {
            i--
            if (i > 0) {
                seconds.innerText = i
            }
            else {
                clearInterval(timer)
                seconds.innerText = i
                location.href = 'http://life.zhoudongqi.com/'
            }
        }, 1000)
        button.addEventListener('click', function () {
            location.href = 'http://life.zhoudongqi.com/'
        })
    </script>
</body>
location.search
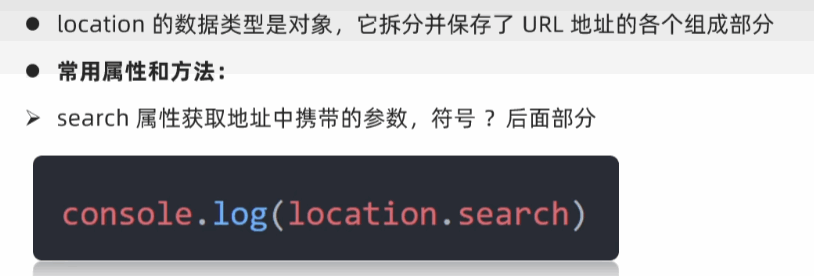
search是获取url中?后的部分
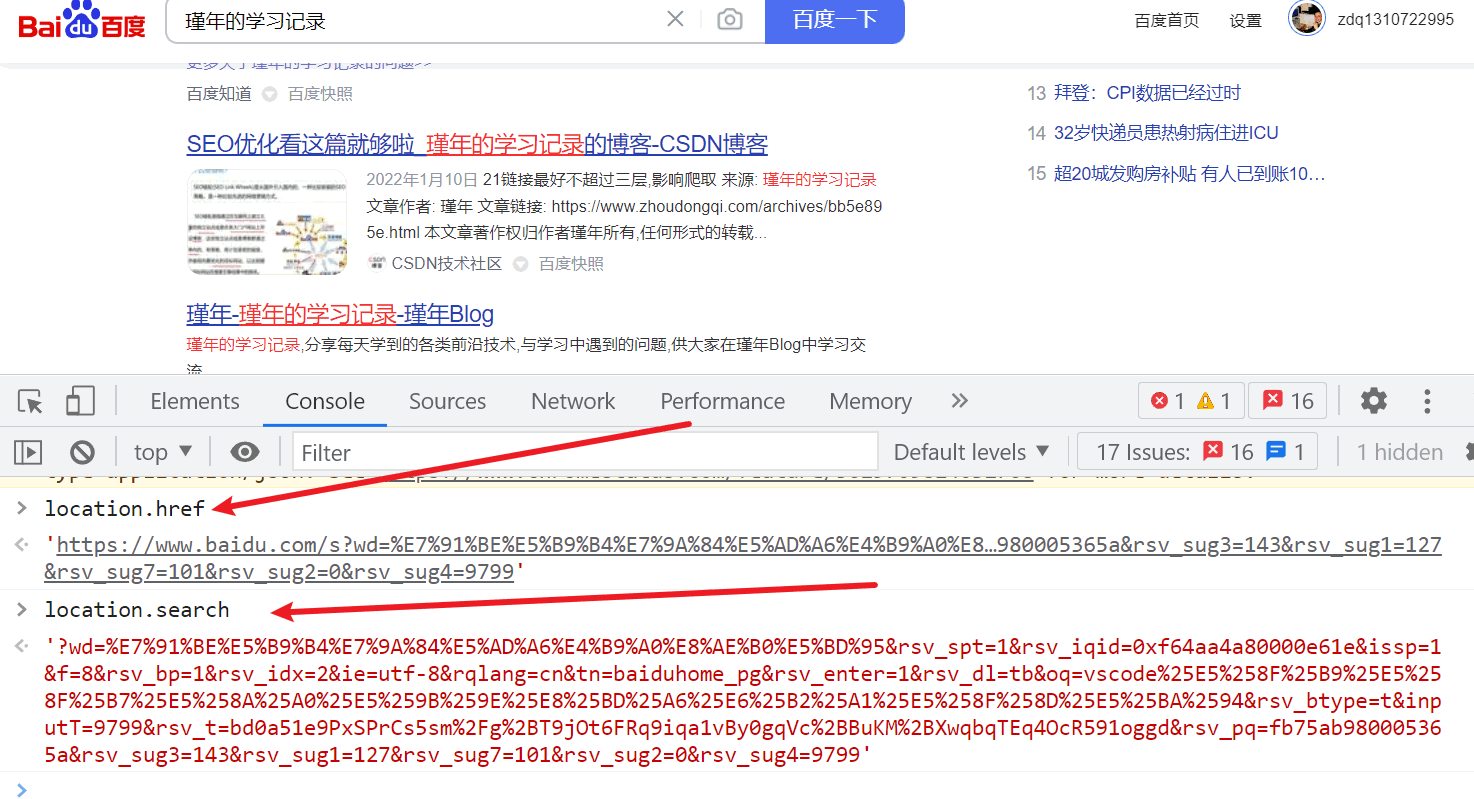
如图,当我们请求一些东西的时候,网址中有问号,一般是传递参数的作用。
href得到的是整个url,search得到?后的内容
location.hash
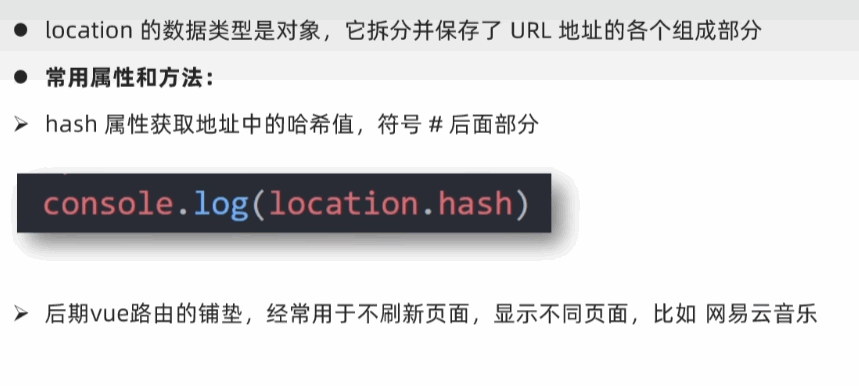
他取的是#后的内容
location.reload()
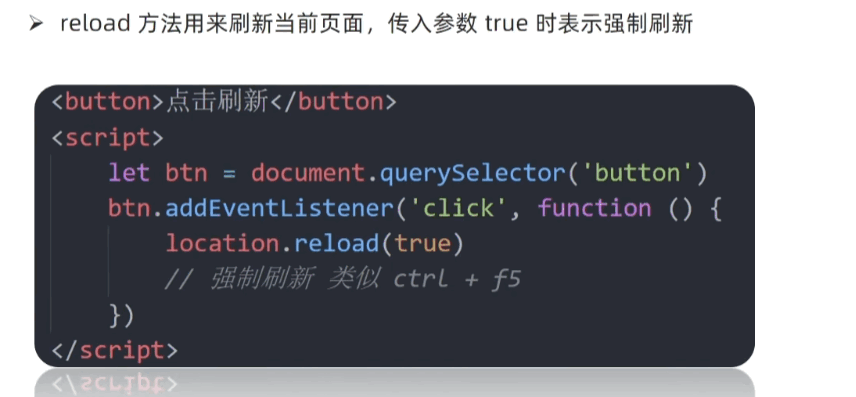
当括号内为空则相当于f5刷新一次,当括号内为true则为ctrl+f5,强制刷新一次
强制刷新是重新从目标服务器获取,不走本地缓存。
navigator对象
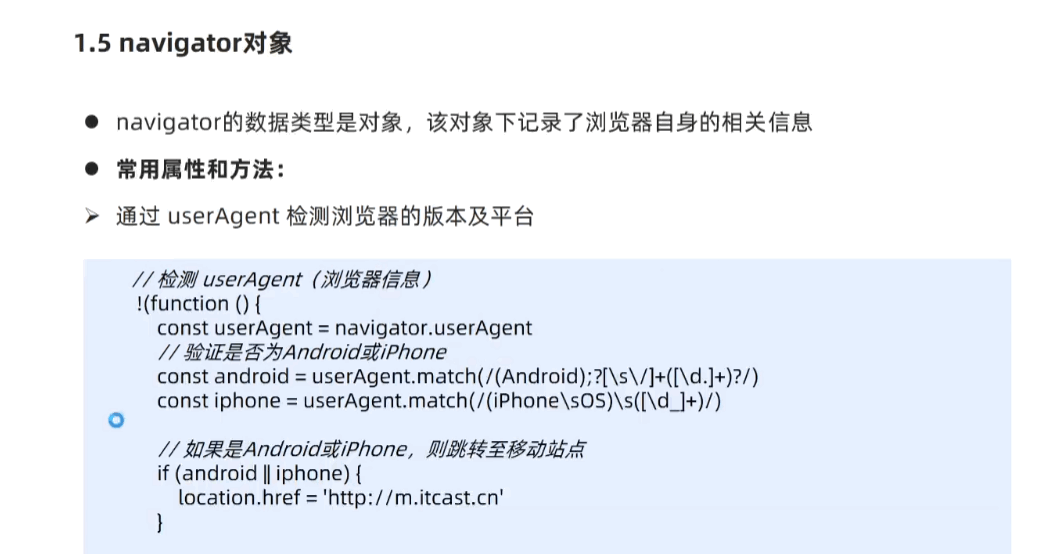
我们可以通过这段js判断用户的浏览器平台,是手机的就跳手机端网页,如你用手机访问jd.com可以自动跳转m.jd.com
history对象
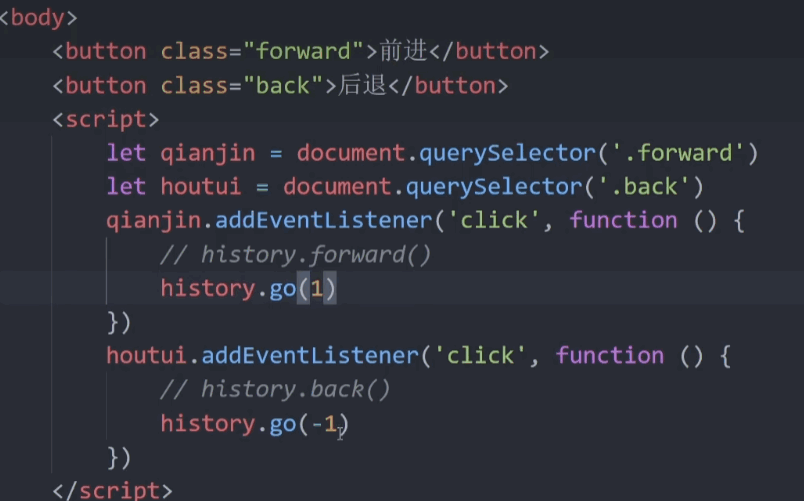
history对象可以让网站回退和前进,类似浏览器的前后退,现在的网站基本上不用它了。
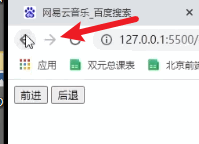
和浏览器中这个前进后退基本上一样
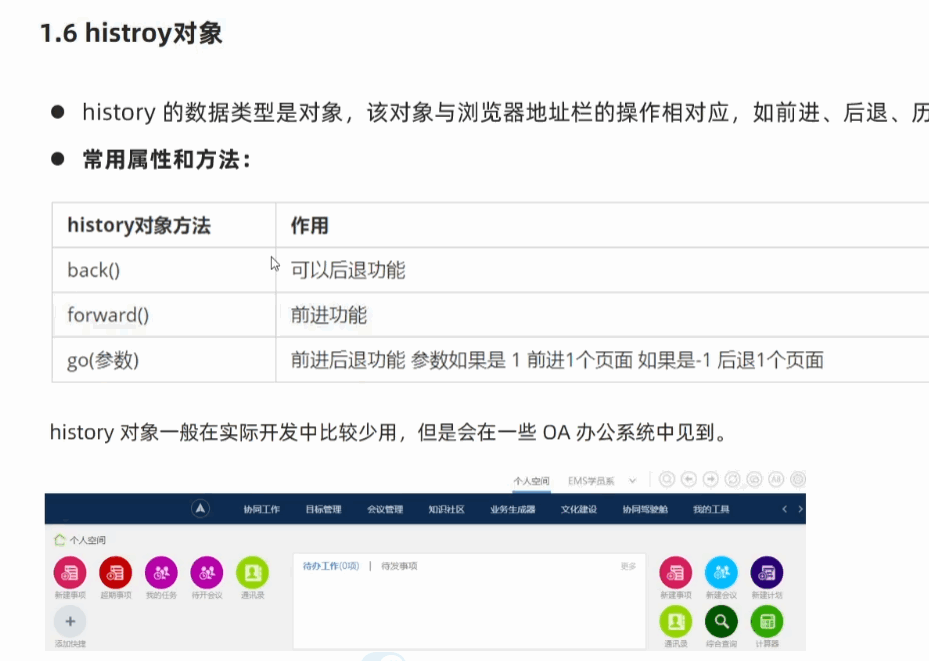
案例
swiper插件
通俗说,swiper插件就是一个专门做轮播图的平台,而且是纯原生写,里面有各种轮播图的代码,我们如果需要用到,直接复制就成

1.首先加载插件,需要用到的文件有swiper-bundle.min.js和swiper-bundle.min.css文件,不同Swiper版本用到的文件名略有不同。可下载Swiper文件或使用CDN。
<!DOCTYPE html>
<html>
<head>
    ...
    <link rel="stylesheet" href="dist/css/swiper-bundle.min.css">
</head>
<body>
    ...
    <script src="dist/js/swiper-bundle.min.js"></script>
    ...
</body>
</html>
2.添加HTML内容。Swiper7的默认容器是’.swiper’,Swiper6之前是’.swiper-container’。
<div class="swiper">
    <div class="swiper-wrapper">
        <div class="swiper-slide">Slide 1</div>
        <div class="swiper-slide">Slide 2</div>
        <div class="swiper-slide">Slide 3</div>
    </div>
    <!-- 如果需要分页器 -->
    <div class="swiper-pagination"></div>

    <!-- 如果需要导航按钮 -->
    <div class="swiper-button-prev"></div>
    <div class="swiper-button-next"></div>

    <!-- 如果需要滚动条 -->
    <div class="swiper-scrollbar"></div>
</div>
导航等组件可以放在Swiper容器之外
3.你可能想要给Swiper定义一个大小,当然不要也行。
.swiper {
    width: 600px;
    height: 300px;
}
4.初始化Swiper。
<script>
  var mySwiper = new Swiper ('.swiper', {
    direction: 'vertical', // 垂直切换选项
    loop: true, // 循环模式选项

    // 如果需要分页器
    pagination: {
      el: '.swiper-pagination',
    },

    // 如果需要前进后退按钮
    navigation: {
      nextEl: '.swiper-button-next',
      prevEl: '.swiper-button-prev',
    },

    // 如果需要滚动条
    scrollbar: {
      el: '.swiper-scrollbar',
    },
  })
  </script>
5.完成。恭喜你,现在你的Swiper应该已经能正常切换了。
如果作为CommonJs 或ES 模块引入
//CommonJs
var Swiper = require('swiper');
var mySwiper = new Swiper('.swiper', { /* ... */ });

//ES
import Swiper from 'swiper';
var mySwiper = new Swiper('.swiper', { /* ... */ });
实际中的使用
1-引入swiper的swiper-bundle.min.js和swiper-bundle.min.css
2-写入你自己的网页结构,留出一个合适大小的盒子给轮播图即可
3-在swiper网站中找到你想要的轮播图,然后新窗口打开,查看源代码,复制它的结构和css和js即可
4-通过控制台调试,修改一下小细节。(一些配置看不懂可以参考文档)
注意当你一个页面,应用了多个轮播图,为了避免冲突,可以给复制的代码中轮播图盒子多加一个类名,然后js实例化的时候也指定这个类名。
<html lang="en">

<head>
    <meta charset="UTF-8">
    <meta http-equiv="X-UA-Compatible" content="IE=edge">
    <meta name="viewport" content="width=device-width, initial-scale=1.0">
    <title>Document</title>
    <!-- 第一步引入css -->
    <link rel="stylesheet" href="./css/swiper-bundle.min.css">
    <style>
        /* 第二步,留一个盒子给轮播图 */
        .box {
            height: 300px;
            width: 400px;
            background-color: pink;
            margin: 0px auto;
            overflow: hidden;
        }

        /* 第三步引入想要轮播图的样式 */
        html,
        body {
            position: relative;
            height: 100%;
        }

        body {
            background: #eee;
            font-family: Helvetica Neue, Helvetica, Arial, sans-serif;
            font-size: 14px;
            color: #000;
            margin: 0;
            padding: 0;
        }

        .swiper-container {
            width: 100%;
            height: 100%;
        }

        .swiper-slide {
            text-align: center;
            font-size: 18px;
            background: #fff;

            /* Center slide text vertically */
            display: -webkit-box;
            display: -ms-flexbox;
            display: -webkit-flex;
            display: flex;
            -webkit-box-pack: center;
            -ms-flex-pack: center;
            -webkit-justify-content: center;
            justify-content: center;
            -webkit-box-align: center;
            -ms-flex-align: center;
            -webkit-align-items: center;
            align-items: center;
            transition: 300ms;
            transform: scale(0.8);
        }

        .swiper-slide-active,
        .swiper-slide-duplicate-active {
            transform: scale(1);
        }
    </style>
</head>

<body>
    <!-- 第二步,留一个盒子给轮播图 -->
    <div class="box">
        <!-- 第三步引入想要轮播图的结构 -->
        <!-- Swiper -->
        <div class="swiper-container zhuyi">
            <div class="swiper-wrapper">
                <div class="swiper-slide">Slide 1</div>
                <div class="swiper-slide">Slide 2</div>
                <div class="swiper-slide">Slide 3</div>
                <div class="swiper-slide">Slide 4</div>
                <div class="swiper-slide">Slide 5</div>
                <div class="swiper-slide">Slide 6</div>
                <div class="swiper-slide">Slide 7</div>
                <div class="swiper-slide">Slide 8</div>
                <div class="swiper-slide">Slide 9</div>
                <div class="swiper-slide">Slide 10</div>
            </div>
            <!-- Add Pagination -->
            <div class="swiper-pagination"></div>
        </div>
    </div>


    <!-- 第一步引入js -->
    <script src="./js/swiper-bundle.min.js"></script>
    <!-- 第三步引入想要轮播图的js -->
    <!-- Initialize Swiper -->
    <script>
        var swiper = new Swiper('.zhuyi', {
            slidesPerView: 3,
            spaceBetween: 30,
            centeredSlides: true,
            loop: true,
            pagination: {
                el: '.swiper-pagination',
                clickable: true,
            },
        });
    </script>
</body>

</html>
本地储存

其中locakStorage使用的多,sessionStorage使用较少。
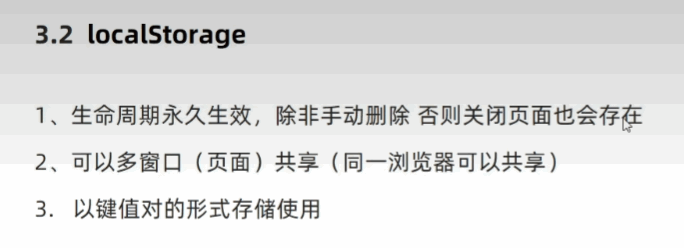
除非手动删除,否则一直存在,以键值对形式储存。
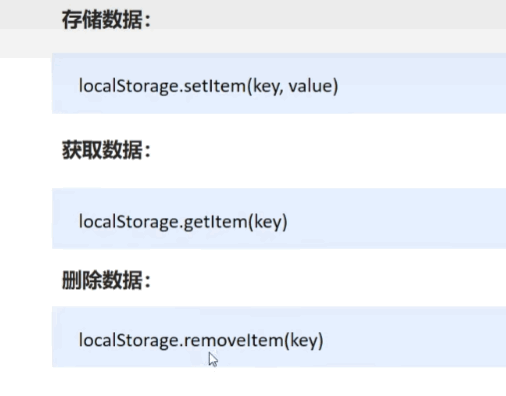
注意:里面的key和value都要带引号。

其中可以在控制台看到,clear all按钮可以删除所有的数据
<script>
     localStorage.setItem("name","token_zhou")
     localStorage.setItem("sex","man")
     localStorage.setItem("birth","2022")
     console.log('我的名字是'+localStorage.getItem('name'))
     localStorage.removeItem('sex')
 </script>
但是我们不禁有个疑惑,我这样设置,真的麻烦,所以上面是简单数据类型,其实还没有存复杂数据类型即引用数据类型对象等。(难点)

JSON:属性和值都需要双引号包含。
当我们把键赋值为对象时,必须把这个对象转换为JSON字符串类型(因为对象传过去,在application无法显示)
数组等引用型数据同理
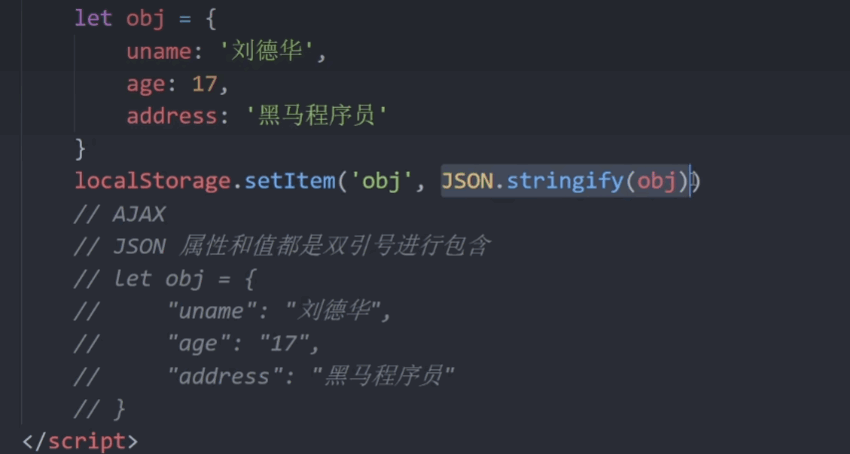
转换为json字符串后,我们再localStorage.getItem得到的也是一个字符串,取数据的时候可以用JSON.parse重新转换为对象。(为什么又转回来,因为我们使用数据的时候,对象更加方便)
sessionStorage
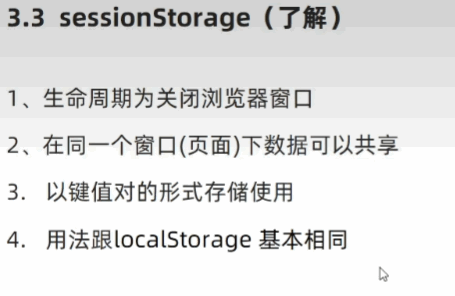
用法和localStorage一样,只是把local改成session
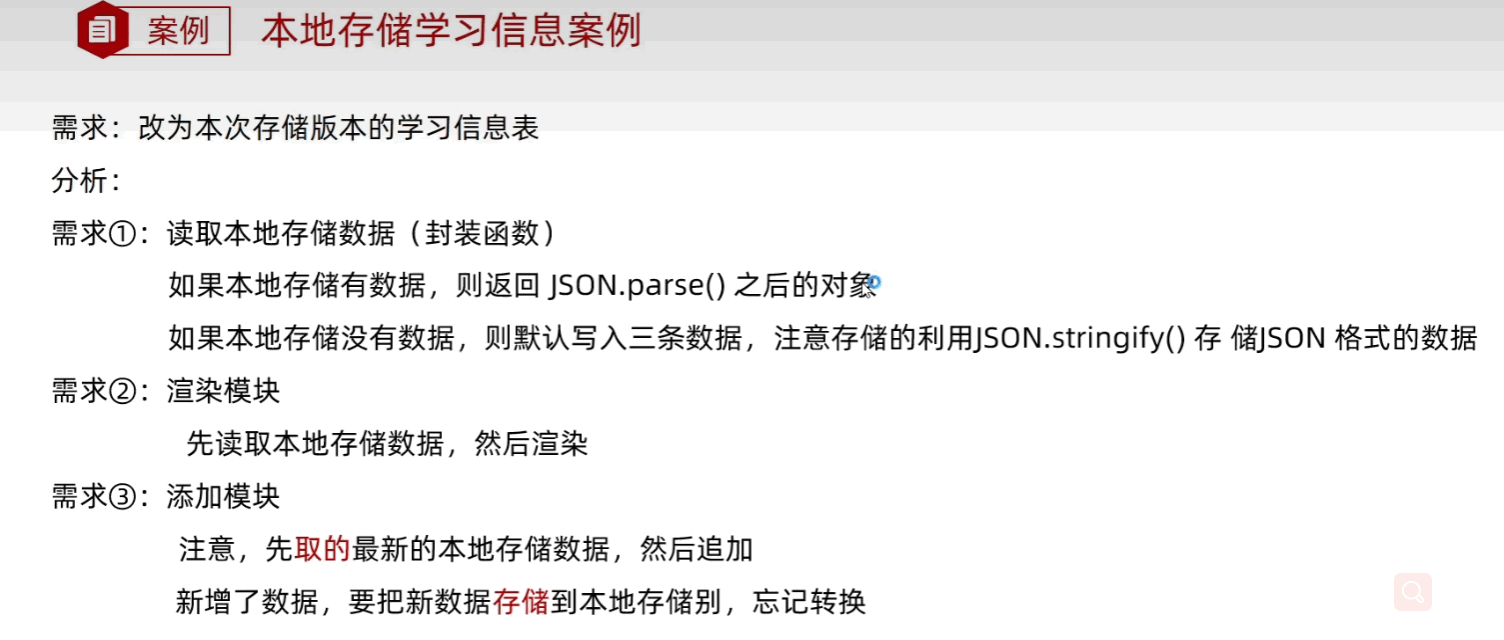
学生信息表
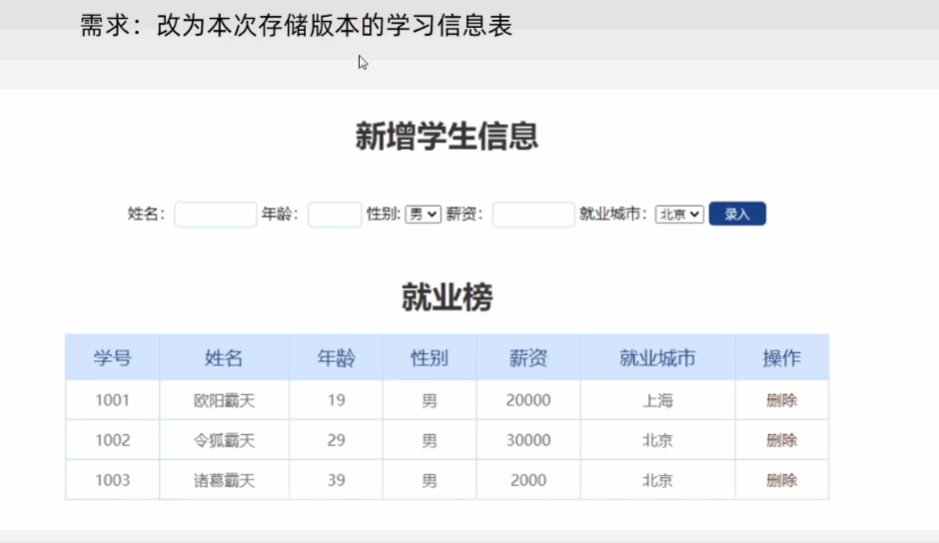
<!DOCTYPE html>
<html lang="en">

<head>
  <meta charset="UTF-8">
  <meta name="viewport" content="width=device-width, initial-scale=1.0">
  <meta http-equiv="X-UA-Compatible" content="ie=edge">
  <title>Document</title>
  <link rel="stylesheet" href="css/user.css">
</head>

<body>
  <h1>新增学员</h1>
  <div class="info">
    姓名:<input type="text" class="uname">
    年龄:<input type="text" class="age">
    性别: <select name="gender" id="" class="gender">
      <option value="男">男</option>
      <option value="女">女</option>
    </select>
    薪资:<input type="text" class="salary">
    就业城市:<select name="city" id="" class="city">
      <option value="北京">北京</option>
      <option value="上海">上海</option>
      <option value="广州">广州</option>
      <option value="深圳">深圳</option>
      <option value="曹县">曹县</option>

    </select>
    <button class="add">录入</button>
  </div>

  <h1>就业榜</h1>
  <table>
    <thead>
      <tr>
        <th>学号</th>
        <th>姓名</th>
        <th>年龄</th>
        <th>性别</th>
        <th>薪资</th>
        <th>就业城市</th>
        <th>操作</th>
      </tr>
    </thead>
    <tbody>
      <!-- <tr>
        <td>1001</td>
        <td>欧阳霸天</td>
        <td>19</td>
        <td>男</td>

        <td>15000</td>
        <td>上海</td>
        <td>
          <a href="javascript:">删除</a>
        </td>
      </tr> -->
    </tbody>
  </table>
  <script>
    // 读取本地存储数据吗,如果有就返回对象,没有就添加三条数据
    function getLocalData() {
      let data = localStorage.getItem('data')
      if (data) {
        return JSON.parse(data)
      }
      else {
        let arr = [
          { stuId: 1001, uname: 'jinnian', age: 19, gender: '男', salary: '20000', city: '上海' },
          { stuId: 1002, uname: 'tang', age: 29, gender: '男', salary: '30000', city: '北京' },
          { stuId: 1003, uname: '亚洲', age: 39, gender: '男', salary: '222000', city: '上海' },
        ]
        localStorage.setItem('data', JSON.stringify(arr))
        return JSON.parse(data)
      }
    }
    // getLocalData()


    // 获取父元素 tbody
    let tbody = document.querySelector('tbody')
    // 添加数据按钮
    // 获取录入按钮
    let add = document.querySelector('.add')
    // 获取各个表单的元素
    let uname = document.querySelector('.uname')
    let age = document.querySelector('.age')
    let gender = document.querySelector('.gender')
    let salary = document.querySelector('.salary')
    let city = document.querySelector('.city')
    // 渲染函数  把数组里面的数据渲染到页面中
    function render() {
      let arr = getLocalData()
      // 先干掉以前的数据  让tbody 里面原来的tr 都没有
      tbody.innerHTML = ''
      // 在渲染新的数据
      // 根据数据的条数来渲染增加 tr
      for (let i = 0; i < arr.length; i++) {
        // 1.创建tr
        let tr = document.createElement('tr')
        // 2.tr 里面放内容
        tr.innerHTML = `
        <td>${arr[i].stuId}</td>
        <td>${arr[i].uname}</td>
        <td>${arr[i].age}</td>
        <td>${arr[i].gender}</td>
        <td>${arr[i].salary}</td>
        <td>${arr[i].city}</td>
        <td>
          <a href="javascript:" id="${i}">删除</a>
        </td>
        `
        // 3.把tr追加给 tobdy  父元素.appendChild(子元素)
        tbody.appendChild(tr)


      }
    }
    // 页面加载就调用函数
    render()

    add.addEventListener('click', function () {
      // 先读一次原数据
      let arr = getLocalData()
      // 获得表单里面的值   之后追加给 数组 arr  用 push方法
      arr.push({
        // 得到数组最后一条数据的学号 1003    + 1
        stuId: arr[arr.length - 1].stuId + 1,
        uname: uname.value,
        age: age.value,
        gender: gender.value,
        salary: salary.value,
        city: city.value
      })

      // 把原数据加上新增的数据加上去
      localStorage.setItem('data', JSON.stringify(arr))
      // console.log(arr)
      // 重新渲染我们的函数
      render()
      // 复原所有的表单数据
      uname.value = age.value = salary.value = ''
      gender.value = '男'
      city.value = '北京'
    })


    // 删除操作, 删除的也是数组里面的数据 , 但是我们用事件委托
    tbody.addEventListener('click', function (e) {
      let arr = getLocalData()
      // alert(11)
      // 我们只能点击了链接 a ,才会执行删除操作
      // 那我们怎么知道你点击了a呢?
      // 俺们只能点击了链接才能做删除操作
      // console.dir(e.target.tagName)
      if (e.target.tagName === 'A') {
        // 当就剩最后一条数据,不允许删除,这里是为了防止一个bug,当装入数据再全部删完,那么arr为空,就无法再获取arr长度,而我们又要用到它,则报错
        if (e.target.id === '0') {
          alert('管理员账户无法删除')
          return

        }


        // alert('你点击了链接')
        // 删除操作  删除 数组里面的数据  arr.splice(从哪里开始删,1)
        // 我要得到a的id 需要
        // console.log(e.target.id)
        arr.splice(e.target.id, 1)
        // 这里虽然没用remove去删除localStorage里面的数据,但是重新赋值覆盖了
        localStorage.setItem('data', JSON.stringify(arr))
        // 重新渲染我们的函数
        render()
      }
    })
  </script>
</body>

</html>
* {
margin: 0;
padding: 0;
}
a {
text-decoration: none;
color:#721c24;
}
h1 {
text-align: center;
color:#333;
margin: 20px 0;
}
table {
margin:0 auto;
width: 800px;
border-collapse: collapse;
color:#004085;
}
th {
padding: 10px;
background: #cfe5ff;
font-size: 20px;
font-weight: 400;
}
td,th {
border:1px solid #b8daff;
}
td {
padding:10px;
color:#666;
text-align: center;
font-size: 16px;
}
tbody tr {
background: #fff;
}
tbody tr:hover {
background: #e1ecf8;
}
.info {
width: 900px;
margin: 50px auto;
text-align: center;
}
.info input {
width: 80px;
height: 25px;
outline: none;
border-radius: 5px;
border:1px solid #b8daff;
padding-left: 5px;
}
.info button {
width: 60px;
height: 25px;
background-color: #004085;
outline: none;
border: 0;
color: #fff;
cursor: pointer;
border-radius: 5px;
}
.info .age {
width: 50px;
}自定义属性
属性有class,id,title等,但是有时为了好区分或者避免冲突,我们可以自定义属性
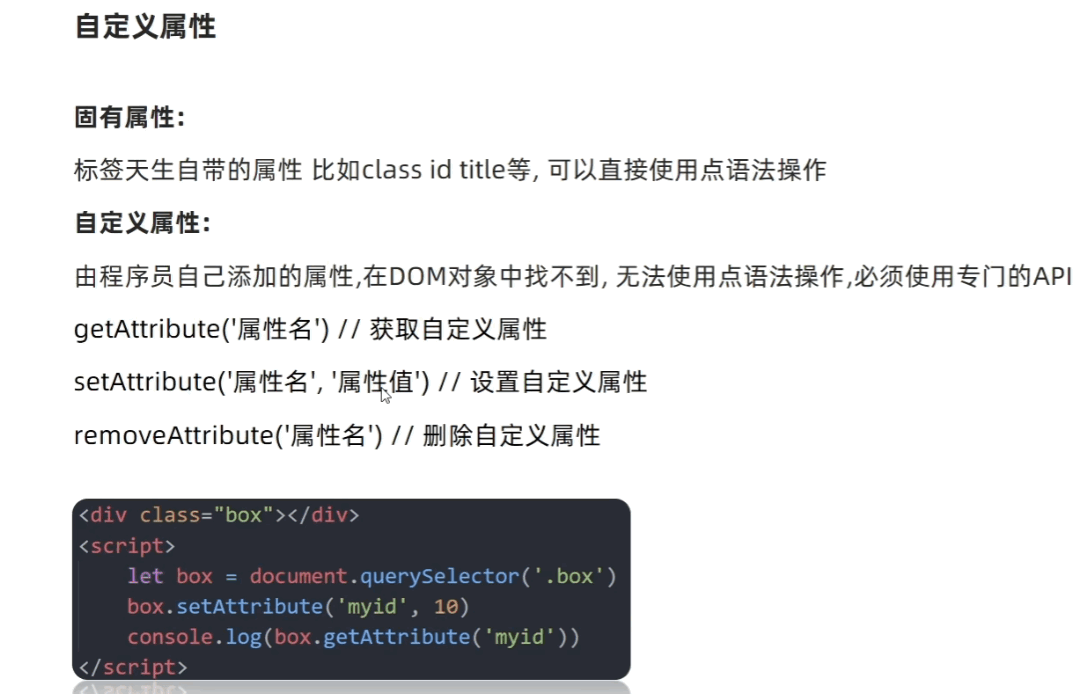
但是因为这个属性有人为设置,可能五花八门,为了后续人员维护,行内有一个通用的默契,就是以data打头,后续html5还推出了标准,这种书写方式的自定义属性,可以用 (对象名.dataset)访问,他包含了此对象的所有自定义属性(以data-打头的)。


